 |
| Dye Wooden pieces |
I've seen fun-looking, colorful, wooden pegs for toddlers and wanted to dye my own for some time now. But how in the world do you dye them safely? I could always slap some paint from Lowe's on the toys, but then I'd have all those chemicals in my son's hands and possibly mouth. I researched and researched. The best idea I read was to use food dyes and I read it here. The site is very useful but the dye 'formula' is vague, so here is what worked for me.
The ingredients needed are food coloring gels, vinegar and boiling water. I used a few small glasses as my containers. Glass won't discolor like plastic might.
You need one glass per color. You want to make sure all of the objects per color you want to dye will fit in one glass. In my case, the peg and bucket both needed to fit in 1 glass. You could use separate cups but the tint might be slightly different, especially if you're mixing (like orange). You don't want your items to be swimming in a huge container either. A smaller container means less dilution and bolder colors.
Put enough water in a pot to fill all of your containers. Bring it to a boil while you work.
Meanwhile, put a splash of vinegar in each cup, maybe a tablespoon. Then squirt in your dye. I used about 1/3 of a gel tube. Use a toothpick to mix the vinegar and dye well. Vinegar is supposed to help the color adhere to the wood.

Place your wooden pieces inside each cup. Something I wish I had done: place the glasses on a cookie sheet! Then when a spill happens, and it will, you don't have to worry about dye getting on the countertop!
When the water is just boiling, pour it into the glasses. Get as close to the top as you can. You don't want space for the pieces to float above the water. Again, make sure the glasses are on a pan or towel to catch spills.
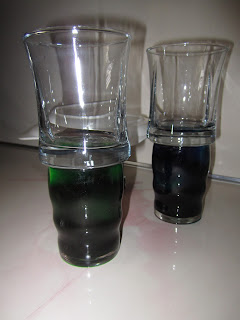
To keep the pieces down, place something with a perfectly flat bottom on top of the glasses. Using slightly larger glasses worked well for me. I also used a small plate. See my spills, oops! Here are some cleaning tips that removed the dye for me.
Now it's a waiting game. I let my pieces stew for 24-36 hours. Every few hours I reached in and rolled the top wooden piece because I worried the top floating edge might not dye evenly. I'm not sure this was necessary, all of the dyed pieces look uniform.
After 24-36 hours, I removed the pieces and placed them on a pile of paper towels to dry. I let them dry a full 2 days and rotated/moved them once a day to make sure all sides dried well. Finally done! They are fun to dye and require little real work, but a lot of waiting - 3 days.
My son loves them. It was so worth it. When he is older it will probably be a great way to practice colors. Right now he just mix and matches to his heart's delight.
A couple of notes:
1) I did not seal these. They have not rubbed off on anything and I have tried. If my son was younger, I would have sealed them because they would have been in his mouth more. I would use an all-natural, food grade beeswax polish like this made by Three Beeautiful Bees. I may still do that if I find the time/energy.
2) Before dying, make sure your pegs fit in the buckets! The pieces are not perfectly uniform so some pegs fit better in different buckets. If I did it over, I would find good fitting pairs and then dye them together or maybe sand a bucket or peg if it just needed a little work.
Craft time: 20 minutes, plus 3 days of dyeing and drying
Play time: 5 minutes here, 5 minutes there. They are well played with.
Cost: Around $5 - use the Hobby Lobby 40% off coupons!
Age: 18 months


No comments:
Post a Comment