Saturday, September 15, 2012

DIY Polyhedrons a.k.a. Paper Balloons

These "Paper Balloons", as my toddler calls them, are so silly and just make me happy. Harness your grade school crafting skills and make some fun today.
 
The supplies needed are 2-5 sheets of 12x12 card stock in your color of choice, super glue, a pencil and ruler. 

Find some circular objects to trace. I used circles from 2.5-5 inches wide by finding wine glasses and candle holders. Trace and cut out 20 circles of the same size from your card stock
 
Now the trickiest part. We want to fold the circles at 3 equidistant points. We need an equilateral triangle that will fit into the circles. To determine the measurement for each side of the triangle, measure the diameter of your circle.


Multiply the diameter by 0.866. My diameter was 2 and 11/16 inches (2.6875). My triangle sides need to be 2.6875 x 0.866 = 2.33. 2.33 inches is my side length needed.


To make the triangle, use the corner of one sheet of card stock. Measure your side length from the corner along one side and draw a dot.


Now from the corner measure out the distance again in a few different places. Draw dots and connect them with an arc.


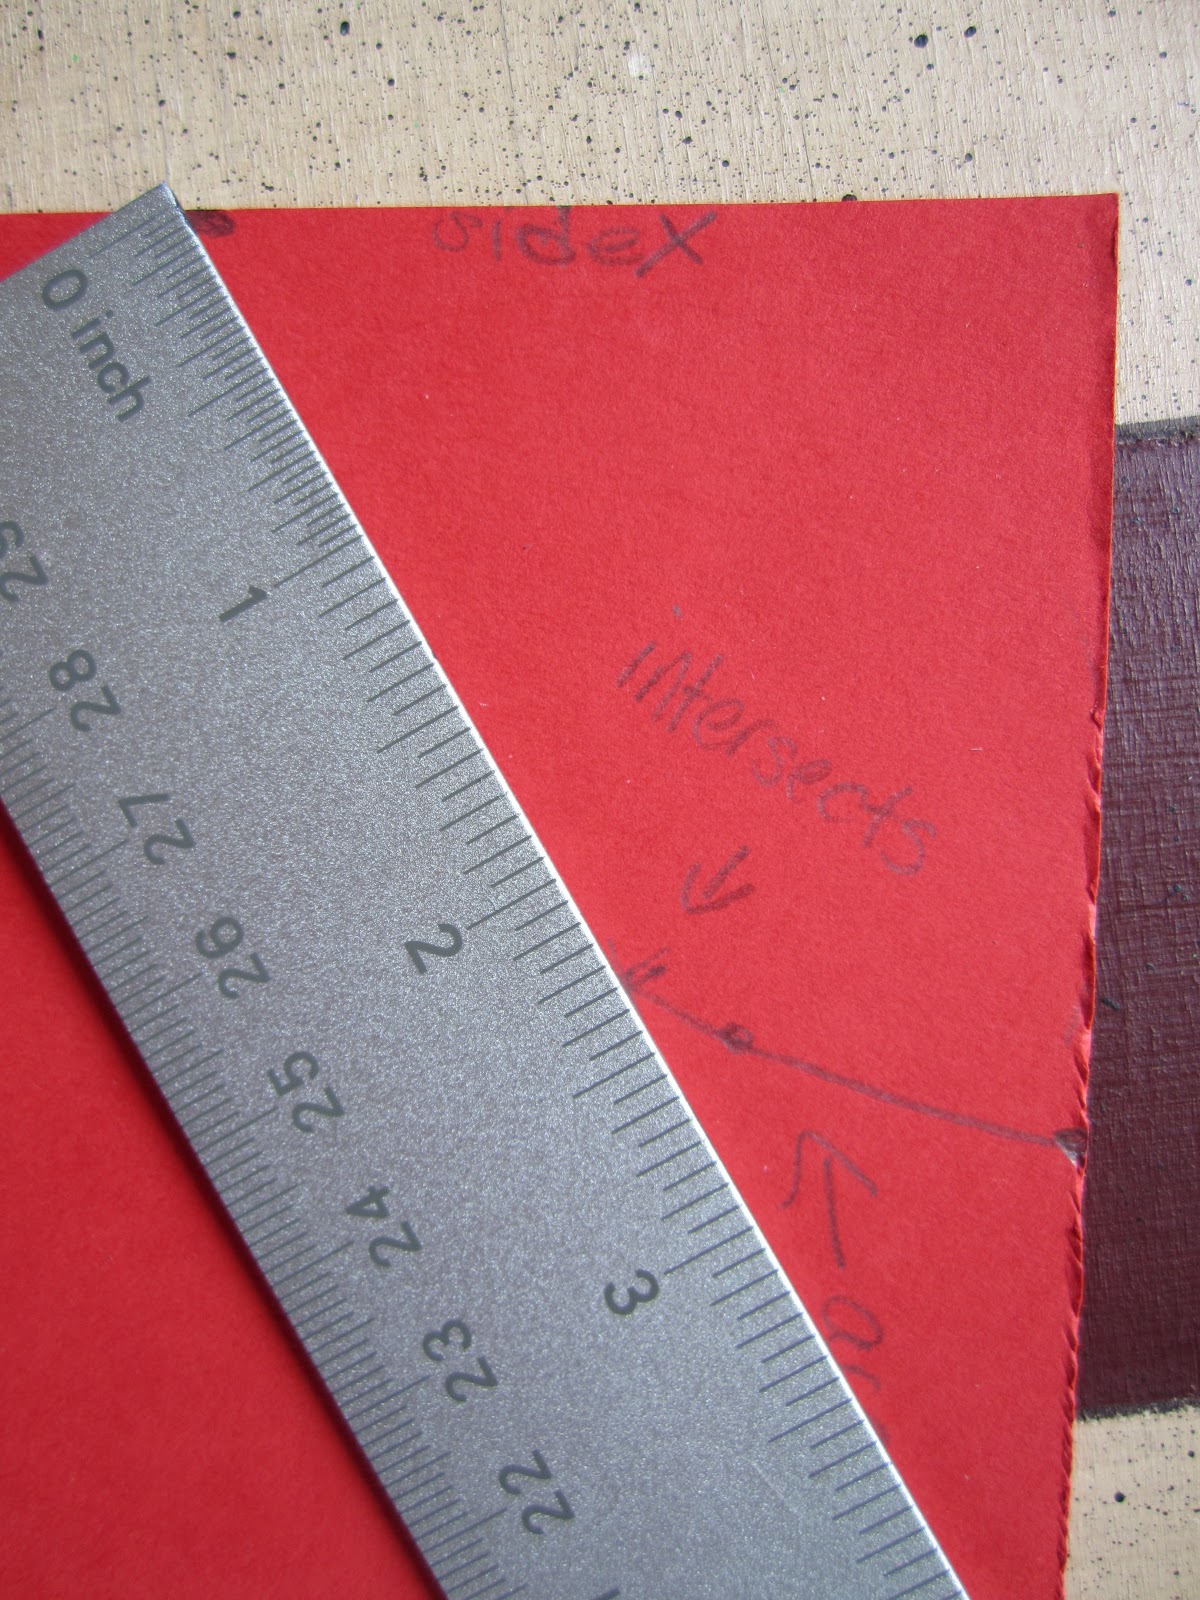
Place the 0 of the ruler at the first dot and measure out your side length, moving the ruler until it intersects with the arc at your length. Make an x.


Draw a line to connect the original dot with the X. Then draw a line from the X to the corner. This is your triangle!


Cut it out. Place it on a circle to see how well it fits. It doesn't have to be perfectly perfect and probably won't be unless all of your circles are precise.


Mark each circle at the corners of the triangle.  You don't have to mark them this darkly.  I did so just to make it easily visible.  You just need a faint mark.


Now we use the ruler to fold a crease from point to point.  Do this for all 20 circles.


Grab your super glue and begin to glue a chain of triangles.  Super glue really works best.  Elmer's glue is too thick and the glue sticks didn't hold the circles for long in our humid summer.
 

Glue the triangles up-down-up-down.  You want to make a chain of 10 to form the middle of your polyhedron.  I held the sides in place for about 10 seconds and then used clothespins to secure the hold.


Use 5 triangles to form the caps.  All the triangles should be pointing up to form the end.
 
Now we have 2 caps and the middle ring.  Glue them in place.  Clothespins are great here because the sides will really want to pull apart.
 
Let it dry a few minutes.  It won't take long, super glue dries so fast.  I used a hole punch to put a hole through one flap.  Fishing line tied through the hole and pinned to the ceiling with a pushpin worked great for hanging them up.  They look so whimsical in the nursery and spin when the fan is on.  Little Man loves them!  "Balloon" was one of his first words and he loves to point to these "paper balloons".


Craft time: Little over an hour per polyhedron
Cost: $1-3 depending on size


Friday, September 14, 2012

Dye Wooden Pegs and Toys

Dye Wooden pieces
I've seen fun-looking, colorful, wooden pegs for toddlers and wanted to dye my own for some time now.  But how in the world do you dye them safely?  I could always slap some paint from Lowe's on the toys, but then I'd have all those chemicals in my son's hands and possibly mouth.  I researched and researched.  The best idea I read was to use food dyes and I read it here.  The site is very useful but the dye 'formula' is vague, so here is what worked for me.

 
First, I bought wooden pegs and wooden candle holders (aka peg buckets) at Hobby Lobby.  They have a lot of small wooden objects, so I may go back for more.  The picture above shows a pre-color bucket in front of the dyed toys.

The ingredients needed are food coloring gels, vinegar and boiling water.  I used a few small glasses as my containers.  Glass won't discolor like plastic might.


You need one glass per color.  You want to make sure all of the objects per color you want to dye will fit in one glass.  In my case, the peg and bucket both needed to fit in 1 glass.  You could use separate cups but the tint might be slightly different, especially if you're mixing (like orange). You don't want your items to be swimming in a huge container either.  A smaller container means less dilution and bolder colors. 

Put enough water in a pot to fill all of your containers.  Bring it to a boil while you work. 

Meanwhile, put a splash of vinegar in each cup, maybe a tablespoon.  Then squirt in your dye.  I used about 1/3 of a gel tube.  Use a toothpick to mix the vinegar and dye well.  Vinegar is supposed to help the color adhere to the wood. 
 
Place your wooden pieces inside each cup.  Something I wish I had done:  place the glasses on a cookie sheet!  Then when a spill happens, and it will, you don't have to worry about dye getting on the countertop!
 
 
When the water is just boiling, pour it into the glasses.  Get as close to the top as you can.  You don't want space for the pieces to float above the water. Again, make sure the glasses are on a pan or towel to catch spills.
 
 
To keep the pieces down, place something with a perfectly flat bottom on top of the glasses.  Using slightly larger glasses worked well for me.  I also used a small plate.  See my spills, oops!  Here are some cleaning tips that removed the dye for me.
 
 
Now it's a waiting game.  I let my pieces stew for 24-36 hours.  Every few hours I reached in and rolled the top wooden piece because I worried the top floating edge might not dye evenly.  I'm not sure this was necessary, all of the dyed pieces look uniform. 


After 24-36 hours, I removed the pieces and placed them on a pile of paper towels to dry.  I let them dry a full 2 days and rotated/moved them once a day to make sure all sides dried well.  Finally done!  They are fun to dye and require little real work, but a lot of waiting - 3 days.
 
My son loves them.  It was so worth it.  When he is older it will probably be a great way to practice colors.  Right now he just mix and matches to his heart's delight.
 
 
 Gotta add a picture of the little guy, right? ; )

 A couple of notes: 
1) I did not seal these.  They have not rubbed off on anything and I have tried.  If my son was younger, I would have sealed them because they would have been in his mouth more.  I would use an all-natural, food grade beeswax polish like this made by Three Beeautiful Bees.  I may still do that if I find the time/energy.

2) Before dying, make sure your pegs fit in the buckets!  The pieces are not perfectly uniform so some pegs fit better in different buckets.  If I did it over, I would find good fitting pairs and then dye them together or maybe sand a bucket or peg if it just needed a little work.

Craft time: 20 minutes, plus 3 days of dyeing and drying
Play time: 5 minutes here, 5 minutes there.  They are well played with.
Cost: Around $5 - use the Hobby Lobby 40% off coupons!
Age: 18 months