Wednesday, March 27, 2013

Easter with a 2-Year-Old

This is a tentative timeline we used to prepare for and celebrate Easter with a 2-year-old.  I wanted to share the most important holiday with our son.  Our Lord died, paying the price for all of our sins for all time, and rose again, conquering death and also granting us victory over death if we follow him.

This is the Sunday we celebrate the Lord's resurrection and our redemption.  As Christians, we are focused on the life of Christ.  As Americans, we want to join in our nation's cultural traditions so we also throw in silly activities like egg dyeing.  Take or leave whatever works for your family!

Saturday:
  • Make a lion and a lamb out of pom poms. Jesus is the sacrificial lamb and the Lion of Judah!  I cut out shapes and covered them with glue, then my son sprinkled on pom poms or positioned the eyes and noses.  He wasn't interested in more than that.  But he likes to play with the finished product.
  • Read a special Easter book such as: The First Easter, a board book with lots of peep holes and cut outs.
Palm Sunday:
  • Palm walk – cut up construction paper to make palm leaves and tape them to the floor of the hallway (make ahead for a morning surprise).  This was a big hit!
  • Practice color sorting with plastic eggs - start with 2-3 colors then add more. 
  • As a family, read Matthew 21, v 1-11: The Triumphal Entry

Monday:
  • Rich perfume – Jesus was anointed for his burial.  Find things that smell good.  Talk about the sense of smell.  Light candles, put yummy smelling lotion on his hands, etc.
  • Let them help bake cupcakes - fun, messy and great smelling.  My little one LOVED helping mama bake!
  • As a family read Mark 14: Jesus is Anointed

Tuesday:
  • 30 Silver Pieces – Place silver coins in plastic eggs to make music
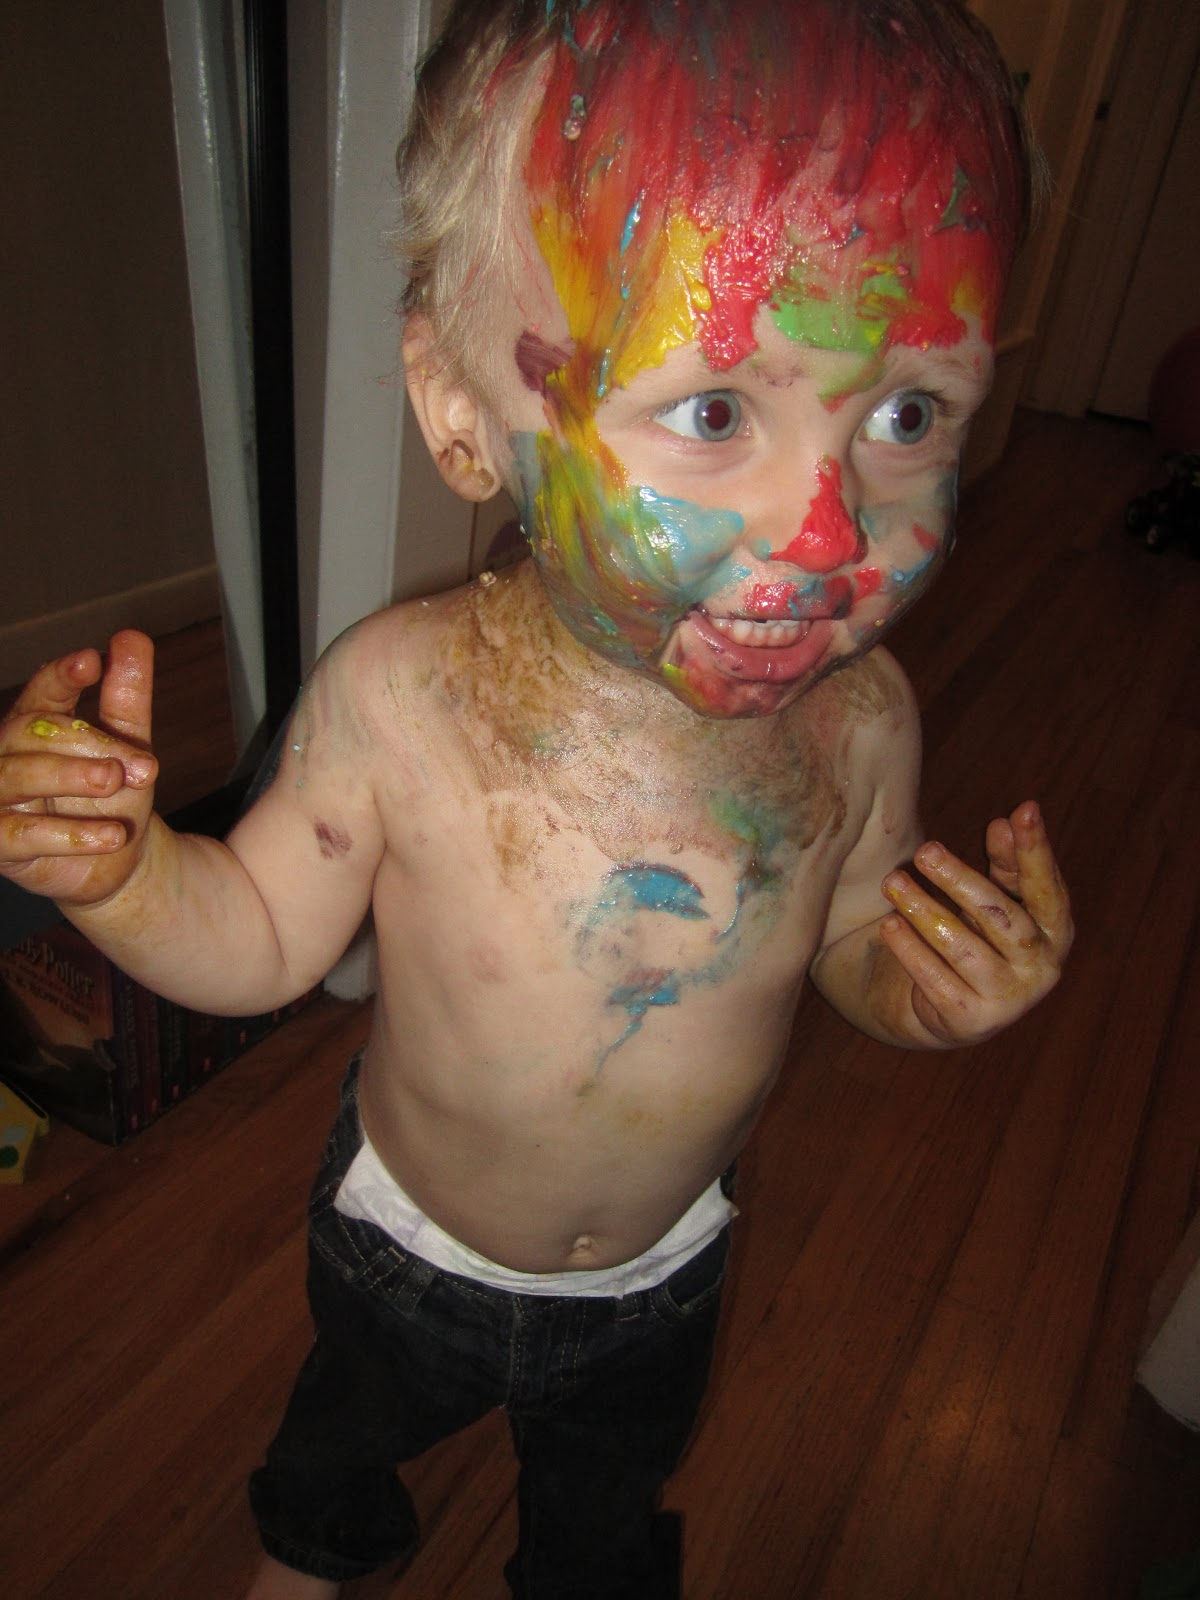
  • Dye eggs.  We used brown eggs in a solution that was half vinegar, half water.  The dye tablets were from a kit at the store.  Brown eggs worked great.  Ours are a bit, ok, maybe a lot, beat up with all of the toddler attention, but he had fun.  He has also loved eating them this week.
  • Read a special book: Easter Surprise has lots of fun flaps to lift and explore.
Shaking his 'silver pieces'
Dyed brown eggs


Wednesday:
  • Last Supper - Color a coloring page of the last supper. Talk about what a disciple is (a student of Jesus).
  • Take apart plastic eggs and have your toddler match the colored tops and bottoms
  • As a family read Luke 22 v 7-30: The Last Supper


    My son was able to match the colors but he had a hard time snapping the eggs together and soon lost interest.  I think this game may require more dexterity than a just-turned-2 toddler has.  (Update: a week or so later he was able to work these better so maybe practice makes perfect?)


Thursday: 
  • Jesus was beaten and mocked.  We decided to make a sign like the one placed over the Christ.  It was placed in mockery but proclaimed truth.
  • Glue pom poms (or buttons, confetti, glitter, etc.) to a cross outline on card stock
  • Create a sign to place over the cross "Jesus:King of the Jews".  Print /write the sign and use a toothpick to attach it to the cross
  • As a family read Matthew 27:11-31
  •  LM Loved this project!  He got a kick out of placing the "small balls" on the cross.  He liked it so much we made something else with pom poms!


Friday:
  • Good Friday.  As John Hart's 'B.C.' comic put it, "If you were going to be hanged that day and the Lord took your place, how would you feel?"  "Good." 
  • Cross – make a cross from sticks in the yard.  This is a great 'Daddy project'.
  • Brighten up your sidewalks by coloring with chalk.
  • As a family read Matthew 27:32-55

Saturday:
  • Tomb and rock: go to a park and collect a small bucket of rocks to play with - because rocks are just really fun at this age.
  • Find a local egg hunt
  • As a family read Matthew 27: 57-65
  •  


Easter Sunday:
  • Jesus’ gift to us!  He is risen!
  • "And as He stands in victory
    Sin's curse has lost its grip on me
    For I am His and He is mine
    Bought with the precious blood of Christ" - 'In Christ Alone' lyrics by Stuart Townend
  • Easter basket filled mostly with small toys, chalk, etc. 
  • As a family read Matthew 28 v 1-10
     
These are activities that my toddler had fun with. Does he now understand the sacrifice of Christ? No, of course not. We are simply introducing elements that can be built on later and, in the meantime, having fun and enjoying the holiday season.

Friday, March 22, 2013

Homemade Face Paint

I began looking for face paint recipes as a way to make some fun, for free, with household products.  Then I learned that The Campaign for Safe Cosmetics performed this test and 10 out of 10 children's face paints tested contained LEAD!  6 out of 10 also contained nickel, chromium, cobalt or a combination thereof.  Wow!  Another shocking reminder that cosmetics are NOT regulated in the U.S.A. 

Now I really had to make my own face paint!  There are quite a few recipes online.  We checked some out and then made our own version - as usual.  The colors turned out very bold and bright.
 
You can find what you need in your pantry: 1 cup shortening, 1/2 cup cornstarch, food coloring gels
 
Put cornstarch in a bowl and press out lumps.  Add the shortening and mix WELL.  You want a good, blended paste.  When it is nice and smooth, add 2-3 Tbs of water depending on the consistency you prefer.  Do not add the water until your paste is smooth or it may end up lumpy (my second, hurried batch was.)
 
Divide evenly into muffin tins and add a 'good squirt' of food coloring gel.  Yeah, real specific, ha ha.  See pic.  I just tried a bit, mixed and added more if necessary.
 
My handy helper had lots of fun getting involved.  He also kept tasting it!  He really thought I was making us a treat.  Add paint brushes, strip your child, and have fun!
 
We did this inside on a cold spring evening.  We put a mirror in the living room and started painting.  I started with a plan for LM to be a clown, but he wanted to paint his own face - and ours.  We let him be creative too!
 
My husband is never one to bother with details like paint brushes.  He dug in with his fingers.  Little Man had so much fun painting himself.
 
Some finished products:
:
It was a really fun family activity.  The paint goes on very smoothly.  I read on some cheer leading sites that similar recipes will dry/last given time and air.  My toddler has never been able to keep face paint on.  He can't resist touching it or accidentally rubbing against something.  Not that we'll ever be using anything but homemade again!
 
Soon after playing, it was bath time for the little guy.  It all washed right off of us without any marks/stains left behind.  Our clothes also seem unstained though we got very little on them to begin with.  (Miracle!)

Craft time: 15 minutes with a toddler helper (but that's part of the play!)
Play time: 30 minutes
Cost: FREE
Age: 24 mth

My only caveat: if you paint your child's head (as my husband did) their hair may be greasy for a couple of days and look like it has gel in it.  We had a hard time fully removing all of the shortening from his hair, but all of the color washed right out.  Not a big deal, but you may not want family photos scheduled.

Tuesday, March 19, 2013

Alphabet Magnets

I've had a version of the alphabet on the refrigerator for about 6 months.  I'm not a big fan of my old letters and some are now missing, so it's time for something new.  A lot of our magnets have suddenly disappeared and I wonder if my son had a fun day playing with the trash can when Mommy wasn't looking...

I guess it's a good time to start again.  Here are our new Alphabet Magnets.

These are super easy to make and take 2 hrs with dry time.

You need: wooden nickels, magnets (I used 3/4" craft magnets), glue, Tempera paint, foam brush, and foam letter stickers.  I bought Silly-Winks Foam Letter Stickers on sale at Hobby Lobby.  (The magnets and nickels were also either on sale or I used a coupon.  I only shop sales at H.L.!) 

Lay down some junk mail/magazine pages to protect your table.  Glue the magnets to one side of the nickels.  Let the magnets sit for a few minutes to allow the glue to fully bond.  Use the foam brush to paint one coat of black paint on the top and sides of your nickels.  Let dry.

After allowing to dry, press a sticker to the front. 

We love these.  They are so bold and fun!

My little man daily goes to the refrigerator to point out a letter to me or bring me one he is interested in for some reason.  I had no idea he had already learned so many!  We have not had any kind of structured 'school time'.  We do have the alphabet displayed on a wall and refrigerator and we read a lot.  That's all I can say.  What an amazing sponge the toddler mind is!
"O" is currently a favorite letter.

The former letters looked like this:
Not so great, huh?  I liked the circus print backgrounds, but the letters were difficult to see well.  I think if I tried again I'd use the printer to make very bold letters or I would use very simple, light colored paper.  Glass is glaring though, and these did not attract my toddler as much as our new, bright, easily read letters.   

Craft time: about 2 hrs (mostly drying time)
Play time: daily, great for learning letters and practicing colors!
Cost: Around $5-6
Age: 24mth, maybe earlier but my toddler can get the magnets to come off sometimes (do they make a super glue impervious to toddlers?!) so be aware of children who may still put objects in their mouth

Thursday, March 14, 2013

Quick Drawstring Toy Bag

This is a quick way to make a drawstring toy bag.  We recently bought my son a train track set for his 2nd birthday and needed a way to keep all of the track pieces together.  This was very easy and cost me about $2.


I started out with half a yard of flannel fabric that my vehicle-loving toddler picked out and about 50" of piping cord (which I had on hand).  Any thick string, yarn, shoestring, etc. could work as your drawstring.

First, I washed my fabric and trimmed loose strings.  I folded it in half and cut about 2 inches off from the selvage edges (4 inches total from the fabric).  This made the bag a little bit narrower and gives a rough idea of the final bag size.
 
I wanted the seams to be French seams to eliminate the fraying that would definitely occur with toys being thrown in and pulled out.  One side of the bag is along the fold, the other side will be sewn.  Pin the fabric together along the side, WRONG sides together.  Leave 3/4" unpinned at the top.  Do not sew this 3/4" section.
 
 
Sew a 1/4" seam wrong sides together (be sure not to sew that top 3/4" of the bag.)  Turn the bag inside out.  Press and pin enclosing the seam you just made.  Sew a 1/2" seam.  This encases the first seam and leaves an unfrayed edge inside the bag.
 
Here's the finished look of the inside of the bag:
 
Create the same French seam along the bottom of the bag.  Sew along the entire bottom of the bag.  You may need to trim the corner where the seams meet to make it easier to sew and lay flat.
 
Now to take care of that top 3/4" section of the side seam. 

This will be where the drawstring enters and exits the bag. This is what the section looks like now.  I pressed the fabric when I created the side seam but left it unsewn. 
 
We first want to cut off the extra layer of fabric - the little rectangle created by the French seam.  You can see that when we unfold it, each side shows 2 rectangles side-by-side created by pressing.  We are removing the outside rectangle to create less bulk.
 
Now that we have removed the extra piece, snip along the bottom edge of the remaining rectangle to allow it to be easily folded.  Fold back the edge of the fabric lining it up with the outside seam of the bag.  If you pin both sides toward the inside and look from the outside, the edges should line up with the side seam.  Clear as mud?
 
 Sew these edges down.
 
From the outside of the bag, it looks like this now:
 
Almost done!  Turning the bag inside out, press down 1/4" along the top of the bag.  Press down another 3/4" inch and pin in place.
 
When you get to the ends, press them just like the rest.
 
Sew in place, creating your casing.
 
Use a safety pin and run it through your cording getting a firm hold.  Push the safety pin in one opening, ease it through the bag and pull it out the other side.  Tie knots in each end of the cord.


Finished!  Fill up the bag with goodies.  I am so happy these train pieces have a home!
 
Cost: Less than $2, less than $5 if you have to buy string
Time: About an hour