I suddenly found bite marks on the crib rail! Yikes, I want this crib to last through all our kids ... and hopefully not be in shambles for the last one. (Pipe dream?)
Anyhoo, a teething guard is now in order. These are easy to make, but just in case you don't want to figure out the plans yourself, here is one way to make them. :)
My crib has two rails in the front (just like the back), so my cover is a little taller than some might need. The area I needed to cover is 51" long and 14" wide, measured from the bottom of one side of the lowest rail, over the top, to the bottom of the other side of the lowest rail. (Make an upside down U.) I made 4 sets of ties and they are about 6" long. If you follow this pattern be sure to measure your crib and decide on the number of ties you want and where you want them.
Needs: 1 1/8 yard of a solid fabric and 5/8 yard of design fabric; 52"x15"
fusible fleece - this will give the cover some dimension and softness.
For the cover: Cut out four 18"x15" pieces from your solid fabric and two pieces from the design fabric. For patterned fabric, 18" needs to be along the horizontal side and 15" is the vertical side.
For the ties: Cut out eight 2.5"x 7" rectangles of solid fabric.
Let's make the ties:
Iron them in half, lengthwise.

Sew a narrow seam around two edges. I placed the edge of the fabric flush with the edge of the sewing foot.
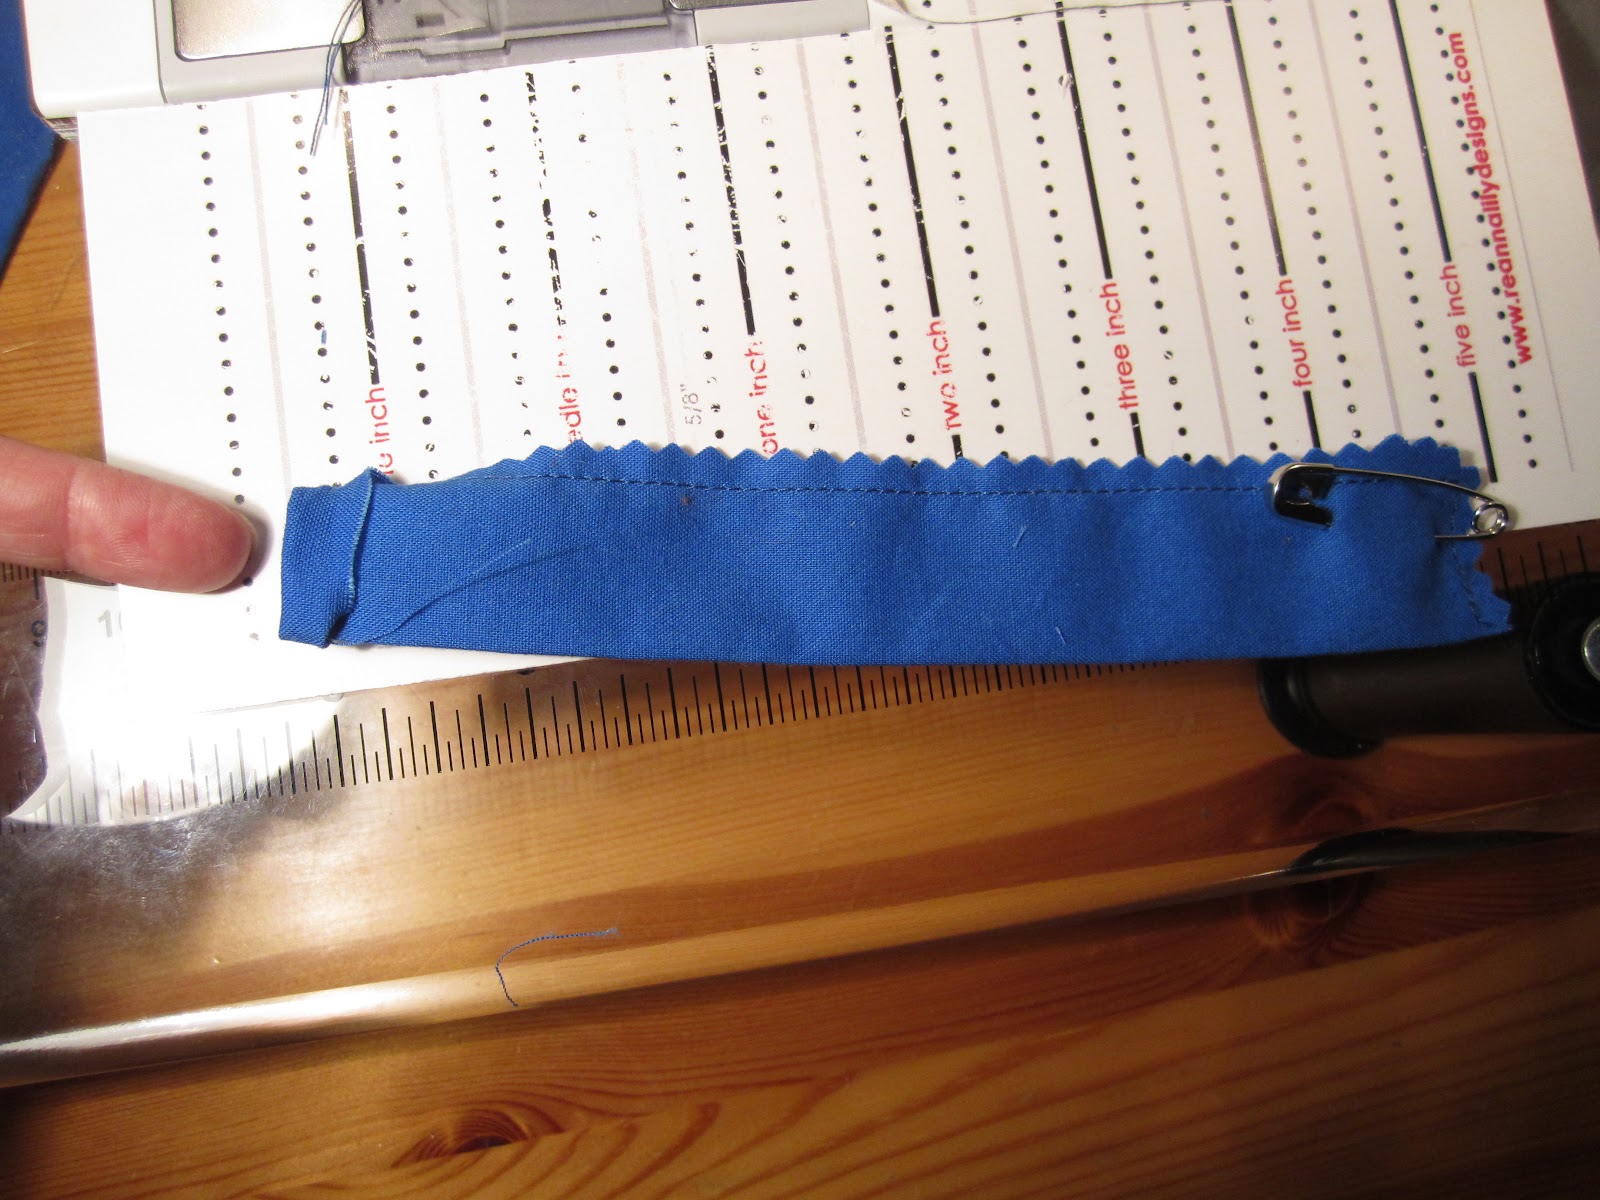
Now trim the seam, especially around the corner. You want to fold down the top of your tie a small bit and attach a safety pin through the bottom.
To turn the tie inside out:
1) Push the safety pin under the folded top.

2)Work the top over the safety pin.

3) Keep going until you have a little cocoon.
4) Use the blunt edge of a skewer to push
the pin as far into the tube as you can.
Really work it in. You should get
almost all the way to the end.
5) Pull out the skewer. Unfasten the pin by
feeling through the fabric and pull it out.
6) Use your skewer to push out the edges
of the tie, focusing on the corners.
Ta-da! One tie down. After figuring out the first one, each tie takes about 5 minutes. Iron your ties flat.
For the cover:
Pin the short sides of three pieces together, in order, with your design sandwiched between 2 solids. Pin them right sides together. Remember, you're pinning the 15" sides to each other.
Sew a half-inch seam. Trim and iron flat. Do this for both sides of the cover.
Now cut out your fusible fleece to fit your cover from edge to edge. Follow manufacturer's directions to iron the fleece in place. (I ironed my bumpy side against the fabric. I layered the fleece, then the fabric and briefly ironed.) I did not have 1 solid piece of fleece. I had to use 3 and iron them in place separately.
Go to your crib and decide where you want your ties. Measure the distance from the end. (I have ties at 10, 21, 32 and 43 inches from the beginning.) Cribs have different size slats, so check yours!
Flip the cover over, right side up. Lay a measuring tape along the side of your cover and pin the ties in place. Do this for both sides so that your ties will meet at exactly the same place. Pin them about 1-1.5" below the edge to leave room for sewing. Be sure your ties point inward!
Layer your second cover right side down, over this and pin in place. Try to match up your seams. Leave a sizable gap at one end to allow for turning the piece right side out. I left about 5-6 inches.
Sew a half-inch seam. Trim - especially around the corners so they will lie flat. Leave longer edges on the side that didn't get sewn. This makes sewing the topstitch less tricky. Turn right side out.
Now use an iron to smooth. Fold under the open edge and iron flat. Pin again - use plenty of pins so your fabrics don't move - and sew a topstitch around the edge, sealing the opening shut. I sewed about a half-inch in from the edge.
All sewn up! Place the guard over your crib and double knot the ties. Stand back to enjoy your handiwork.
This would be a great piece to do some fun quilting on. Alas, I am not a quilter. But this serves our purpose and coordinates beautifully in my little guy's dinosaur nursery.
Craft time: 4 hours
Cost: $4- fleece, $10-fabric (and it matches perfectly!)
PS: I quickly made this one day after finding bite marks. Looking online now, I see there are many tutorials for crib guards, so look around and find something that works for you. :)