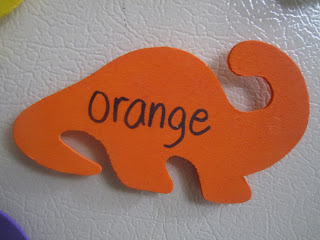
This is a super-simple, low-cost project that my son really enjoyed.
I found a 10-pack of wooden dinosaurs at the Dollar Tree. Using a sponge brush, add two coats of paint to both sides of each dinosaur, letting it dry between coats and sides. Two coats is necessary on unfinished wood that hasn't been primed.
I'll be honest, the hardest part was mixing brown! I did not have any brown on hand. After 3 failed attempts, 30 wasted minutes, and much exasperated grumbling, I finally went to my husband in defeat. Without hesitation, he told me the standard recipe was to equally mix the three primary colors. Simple! (He's so smart.) A little red, blue and yellow later, and we had brown! You can add more of one color to give your brown a different tint.
I'll be honest, the hardest part was mixing brown! I did not have any brown on hand. After 3 failed attempts, 30 wasted minutes, and much exasperated grumbling, I finally went to my husband in defeat. Without hesitation, he told me the standard recipe was to equally mix the three primary colors. Simple! (He's so smart.) A little red, blue and yellow later, and we had brown! You can add more of one color to give your brown a different tint.
Next, I wrote the color on the front of the dinosaur with a sharpie. Actually, I did this after applying the magnets, but it would've been easier, and less sloppy, to do it beforehand.
You can get a 50-pack of round craft magnets for about $3. Attach them to the back of the dinosaurs with super glue.
All done! These are really easy and a great way to expose your pre-toddler to colors. Maybe as he ages they will be a fun learning tool. Right now, they're a fun toy. It's so nice to have him happily occupied at the refrigerator while I work at the sink or stove....you know, instead of pushing every button on the dishwasher or climbing the stepstool to get into the pantry.
Craft Time: 3.5 hrs (including 30min of drying time after each coat)
Play Time: 15 min
Cost: Less than $5 (if you have paint on hand)Age: 14 months


No comments:
Post a Comment